Skyrim:Folgunthur
|
|||
|---|---|---|---|
| # of Zones | 2 | ||
| Clearable | Yes | ||
| Dungeon | Yes | ||
| Respawn Time | Never (storage is safe) | ||
| Level | Min: 6 | ||
| Occupants | |||
| Draugr, Frostbite Spiders, Mikrul Gauldurson | |||
| Important Treasure | |||
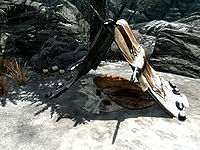
| Fire and Darkness Gauldur Amulet Fragment Gauldur Blackblade Ivory Dragon Claw |
|||
| Console Location Code(s) | |||
| FolgunthurExterior01, FolgunthurExterior02, FolgunthurExterior03, FolgunthurExterior04, Folgunthur01, Folgunthur02 | |||
| Region | |||
| Hjaalmarch | |||
| Location | |||
| Southeast of Solitude West of the Abandoned Shack |
|||
| Special Features | |||
| Word Wall | Frost Breath | ||
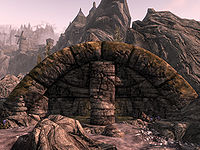
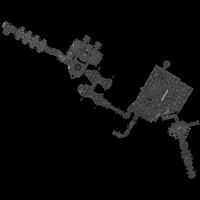
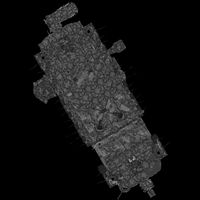
Folgunthur is a medium-sized Nordic ruin southeast of Solitude containing draugr, frostbite spiders, and the draugr Mikrul Gauldurson. It contains two zones: Folgunthur and Folgunthur Crypt.
Its word wall teaches part of the Frost Breath dragon shout.
Related Quests[edit]
- Forbidden Legend: Investigate the forgotten Gauldur Legend.
Walkthrough[edit]
Exterior[edit]
The deserted camp of Daynas Valen and his group of hired adventurers is just a few paces west of the entrance. It consists of four small tents, each containing an unowned bedroll, arranged around an extinguished campfire. One of the bedrolls has his journal on top. There are several deathbell plants, a canis root, and a couple swamp fungal pods around the camp and near the entrance to the ruins. Farther to the west, near the shore, is another deserted camp, which you're likely to stumble upon if you come here from Solitude and swim across from the docks. This second camp is under cavernous rock formation which sits behind three evenly spaced, rectangular stone sculptures. It consists of two hay piles, an extinguished campfire with a functioning cooking pot hanging over it, and several crates, food sacks, and barrels. On one of the crates is a copy of the Pickpocket skill book Purloined Shadows.
The area in front of the entrance is covered, with a stone table to the left of the door. On the table is a filled random soul gem, and flanking the table are two burial urns. To the left of the table is a stone bowl containing a large coin purse.
Folgunthur[edit]
The entrance leads into a passage flanked by large statues, with bone chimes hanging down in front of a doorway ahead and stairs leading down to the north beyond. At the bottom of the first flight of stairs is a pressure plate, the body of one of the adventurers, and several dead draugr. The pressure plate triggers a spear trap from the statues on either side. Two burial urns are found in one of the alcoves by the statue on the right. Another flight of stairs descends to an open doorway at the bottom, with a keyhole for a dragon claw on the left. Through the doorway is a room with a central stone table with a plinth in front that has another claw-shaped keyhole in the top, as well as a puzzle comprising four rotating pillars and matching symbols; the puzzle has already been solved, as another gate has been raised in an open doorway to the north. On the table is a pickaxe and an empty random soul gem, with a second pickaxe on the floor. There is another dead adventurer and several more dead draugr around the room. To the left of the table is a burial urn and an open crate containing a bottle of alto wine, a tomato, and two loaves of bread. To the west is a broken sideboard with a random potion of magicka beside it, and farther back is a set of shelves holding a random pair of gauntlets. To the east is a concealed door with yet another claw-shaped keyhole to the left of it. You will need the ivory dragon claw in order to open this door. There is a burial urn beside it for storing any spare items while you explore.
Through the door to the north is a passage with another pressure plate a few paces along that triggers a flame spout trap from the statue at the corner ahead. There are the burnt remains of another adventurer on the ground. Just past the corner is the first living draugr. After another turn, the passage enters a two-level room containing several sarcophagi. There are two oil slicks, one at either end of the room, with an oil lantern above each. There is a long stone table near the middle, with two dead draugr and a burial urn beside it. As soon as you enter, the gate behind you will close, and several draugr will emerge from their sarcophagi. Once the draugr are defeated, there is a chain to the right of the doorway that raises the gate, and sideboards on either side. The sideboard to the right when facing the gate has a random shield on top. At the western end of the room is another dead draugr and another dead adventurer, with a copy of the One-handed skill book Fire and Darkness beside them. To their right is a passage that leads to a stone table with a random set of armor, a random mace, and a large coin purse on top. At the northern end of the room are some sets of shelves and a stone table holding a random mace and a random helmet. To the right of the table is a doorway leading to a wooden spiral staircase, with a trap door at the bottom that opens over a flooded shaft. At the bottom of the shaft is a spike pit, with a medium coin purse and a random greatsword among the spikes. There is a handle under the water and a lever within reach above the water that each toggle the trap door open and closed. Followers may have trouble making it up the staircase. If that happens you can always continue on, and they will appear beside you at the beginning of the next zone.
At the top of the staircase, you re-enter the previous room on the upper level. Cross a wooden bridge to a central area where there are three dead draugr, yet another dead adventurer, and the body of Daynas Valen. He carries the ivory dragon claw and his notes, which provide some additional background on Gauldur and his sons (also advancing the quest Forbidden Legend if you have started it), but don't appear necessary to finish clearing the dungeon. His body is leaning against another claw-shaped keyhole, which when activated with the ivory dragon claw lowers another bridge immediately ahead and allows you to continue. Keep the claw, as it is required to unlock the puzzle door later on. When the bridge is lowered, two draugr standing in some catacombs beyond are revealed. Across the bridge is a junction, with a pressure plate that triggers a spear trap from the sides in front of a short passage to the left. There are two dead draugr standing in alcoves along this passage; at the end is a random potion of resist element and an adept-trapped chest that triggers a poison dart trap if opened without disarming. To the right, there is a slumbering draugr standing in an alcove opposite and another on your right, with a dead draugr standing in an alcove to your left. There is a broken table to the right with a random war axe on top. To the left is another area, with a slumbering draugr standing in another alcove ahead and a large urn in an alcove on the right. In the center is a lit brazier, and to the northwest is a short passage with two levers on either side and a series of lowered gates ahead. Each lever opens or closes one or more of the gates. To open all gates, pull the first left-hand and second right-hand levers (the puzzle is reset when all levers are pointing down).
Once past the gates, the passage descends a flight of stairs. Toward the bottom, the stairs become much wider and end in a cave-in on the left side, with a large urn, a random poison or potion, and a random warhammer among the rubble. As you move to the right and the other half of the wide stairs, a rockfall is triggered and rolls down the stairs in front of you, possibly damaging a draugr standing at the bottom. Behind the draugr is a closed wooden door. Through the door is another room containing two thrones, both occupied by draugr, who awaken as soon as you enter or if you use a ranged attack on either of them from the doorway. In the middle of the room is a large trap door with a wooden spiral staircase underneath. On the far side of the room is a doorway, but the passage beyond has caved in. To the left of the cave-in is a stone table, with an urn to the left of the table. There is a lever by each of the thrones, and a chain opposite them. Avoid pulling the chain until you have finished solving the following puzzle or you will trigger a poison dart trap. The levers operate large rotating stones that block one of two doors in the corners behind the thrones, such that one door opens while the other closes. Entering the first of these rooms causes two draugr to burst from upright sarcophagi in a small area at the rear of the room. There are three symbols in this room. Starting from the entrance, they are Snake—Whale—Hawk. You need to mirror these symbols on the rotating pillars in the second room. This second room has another draugr and a spellcaster trap that shoots Lightning Bolts if triggered by standing on a pressure plate near the back of the room. Remove the soul gem to deactivate it. Opposite the pillars is a stone table with a filled random soul gem on top. Once you have the pillars in the correct order, pull the chain in the main room to open the trap door in the floor and gain access to the staircase. If it shoots arrows, switch the order to Hawk—Whale—Snake it's mirrored.
The stairs descend a long way to reach a shallowly flooded passage patrolled by two frostbite spiders. There is a deeper section on your right, with a leveled greatsword under the water. The passage ahead rises and passes a burial urn on the right. At the top is a small set of shelves on the left holding a random cuirass and a stone bowl containing an empty random soul gem, and a larger set of shelves on the right holding a random potion of healing, a random dagger, and a leather strip. The passage ahead has three sarcophagi on either side, an urn on the left near the entrance, and a puzzle door at the far end. As soon as you enter, the door will close behind you, the passage will darken, and the sarcophagi will burst open two at a time and release draugr, allowing you to deal with each pair individually. Once the draugr are all dealt with, you can reopen the door behind you if you wish. The puzzle door has the combination Hawk—Hawk—Dragon from the outermost circle inward, as per the inside of the ivory dragon claw. Beyond the door is a passage, with an urn and a burial urn on your right, and a stone table in front of you holding a small coin purse, a random sword, and a random helmet. To the left are double doors that lead to Folgunthur Crypt.
Folgunthur Crypt[edit]
Upon entering, you are in a passage at the bottom of a flight of stairs. At the top is a small shelving unit holding a random warhammer, a random pair of gauntlets, and a potion of healing. To your left is a large opening into a large chamber with several pairs of pillars supporting the roof, and between these a sarcophagus containing the remains of Mikrul Gauldurson. He will arise as you approach along with several draugr thralls, which will be replaced by others from the twelve sarcophagi around the chamber as they are defeated. They are different from normal draugr in that they carry no weapons, and instead hold only a few septims each. Once you defeat Mikrul, any remaining draugr thrall will also perish, and any that hadn't yet risen will burst from their sarcophagi dead. Mikrul's corpse contains the Gauldur Blackblade, a Writ of Sealing, and a Gauldur Amulet Fragment (a quest item for Forbidden Legend). The first half of the large room is devoid of anything of interest. There is a single urn on the right among the sarcophagi, a burial urn at the rear on the right, and two flights of stairs at the rear blocked by spears. Both are lowered by using the ivory dragon claw in keyholes to either side. There is a cave-in behind spears on the left, and a burial urn and a large coin purse can be found among the rubble. The stairs on the right lead up into a room which may contain a dragon priest and two draugr. The room features a word wall which teaches part of the Frost Breath shout. At the top of the stairs are two sets of shelves, one taller than the next. On the shelves are many ruined books and a couple coin purses (see bugs). A burial urn is partially buried in the rubble to the left of the shelves. In front of the word wall is a stone table holding an unlocked boss chest, a random one-handed weapon, gauntlets, and shield, a random potion of healing, and a random poison. An iron door at the rear of the room has a random greatsword in front on the right (see bugs). The door opens into a tunnel in the first zone, with a random potion of healing, magicka, or stamina beside a lit brazier partway along. At the top, a sarcophagus lid you must activate to open leads you to the junction by the bridge you previously lowered with the ivory dragon claw. You can jump down from here and retrace your steps to the entrance. Back in the first room, don't forget the concealed door that can be opened with the ivory dragon claw; behind the door is a small room containing an apprentice-locked chest.
Notes[edit]
- Folgunthur also appears in ESO as Folgunthur Barrow.
Bugs[edit]
- Sometimes, the pillars won't move when you attempt to activate them.
- The pillars should respond if you leave the dungeon and immediately re-enter.
- Sometimes, you will be unable to get the Frost Breath word from the wall, and the sound will loop repeatedly.
- The issue may resolve itself if you return after everything has respawned.
- The last gate when exiting back into the entry area sometimes gets stuck, and cannot be opened with the lever if it is closed.
- Turning the console off and reloading the game fixes this issue.
- The coin purses on the shelves in the room with the word wall may be invisible, although it is still possible to pick them up. ?
- The random greatsword by the rear door of the word wall room may be floating at waist height due to a glitch.
- If you bypass the drawbridge by using Whirlwind Sprint, the two draugr behind the bridge will not become hostile. ?
- Folgunthur doesn't seem to respawn. ?


